By now, you should be able to log in to the unit blog. When you do, you see the WordPress author admin page, which looks something like a simpler version of this:

To create a new post, mouse over the Post menu item, then click the Add Post link.

The screen should change substantially, loading what WordPress calls the “Gutenberg Editor” as shown below. This is a relatively new, and quite nicely designed “block oriented WYSISYG editor.”
For now we will use it as a simple word processor, and unlock more features as needed.

First – Click the “Add title” heading, and give your post a working title.

Since you’ve already drafted your post in a Word Processor, go to that application and copy all the text you’ve written so far.
Come back to the WordPress editor.
Click the text “Type / to choose a block” and CTRL+V (CMD+V) to Paste the text into the WordPress editor.
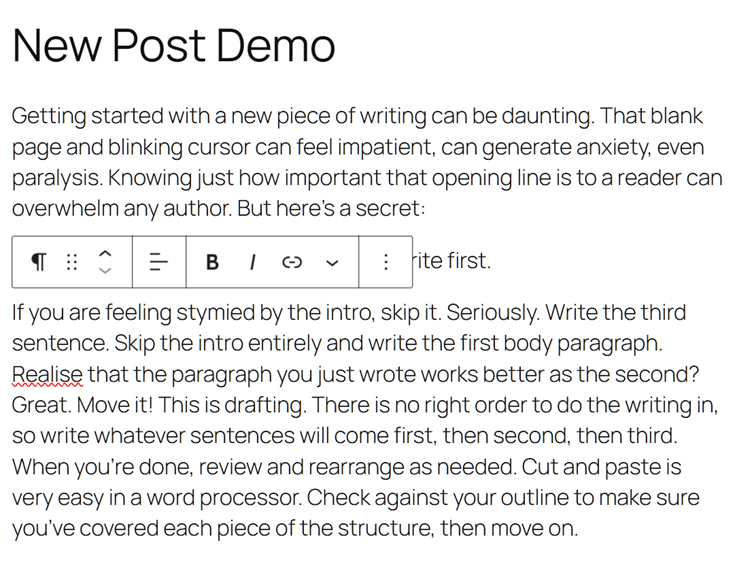
You should see your text appear! Magic!
You’ll also see this floating toolbar appear that is likely covering up some of your text.

That is the block-level formatting tool. In WordPress, content is organized into “blocks” which can be formatted individually. In this case all of our blocks are just paragraphs, but they can be composed of all sorts of content from images to galleries, headings, code blocks, and much more.
For now, simply notice that if you move your cursor to a different block (i.e. click in a different paragraph), the toolbar moves around with you and will apply formatting to that specific block.
In the top right of the screen, there are two important buttons as shown below:
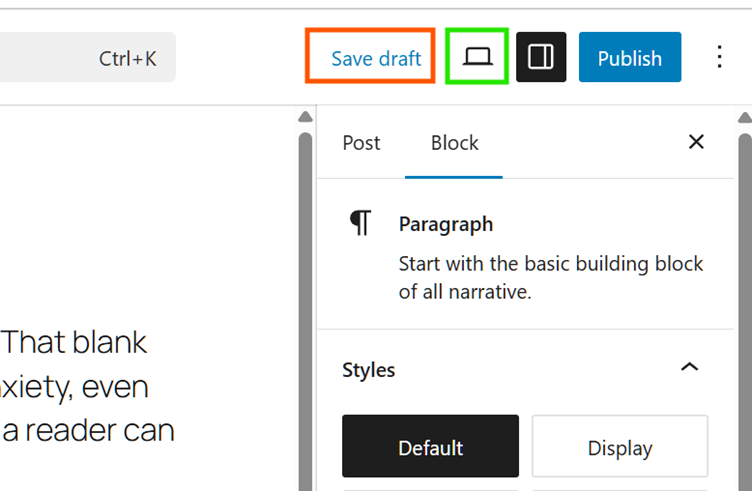
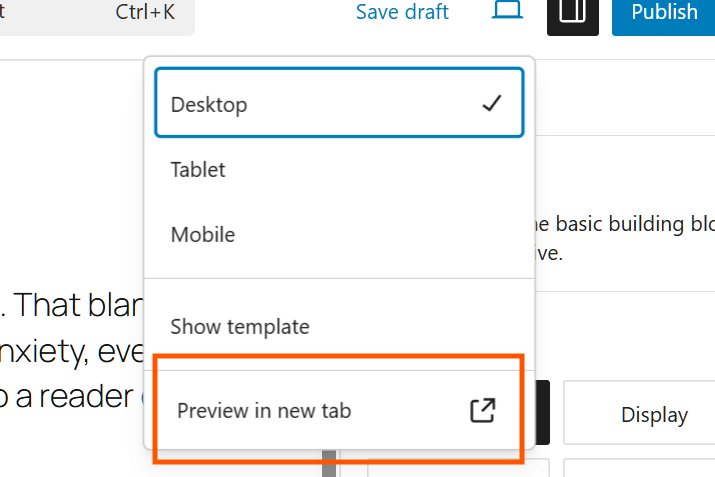
“Save draft” and the icon that looks like a laptop. Firstly, let’s save your work by clicking that link. Next, click the laptop icon. You can select what environment you’d like to simulate by picking from this menu. For now, leave Desktop selected, then click “Preview in a New Tab”
A new tab should open in your browser. This tab will show what your post would look like, if it were published to the blog. In our demo environment I’m showing you here, it isn’t very interesting! But you can see how the text renders, which is important.
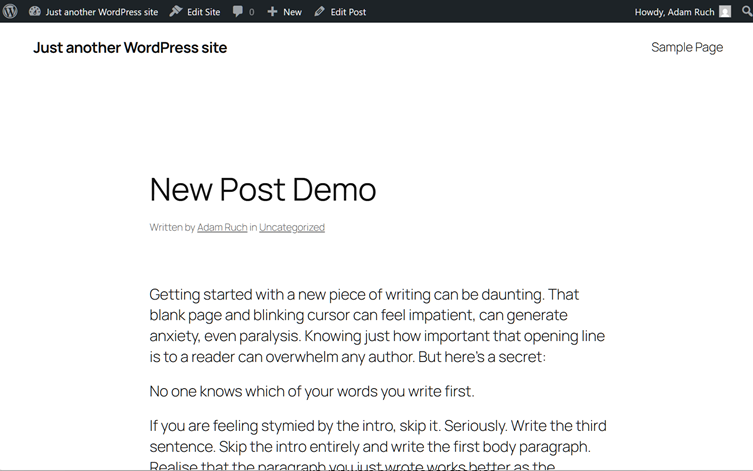
Notice how it generates byline as well as displays the “Uncategorized” link just below the title. You didn’t have to do any of that coding, since our blog is running all the styling algorithm for you.
You can close the preview tab and return to the WordPress editor. Let’s add a link and an image to this post to cover those basic elements of writing online.
First, select a word or phrase that you want to make a link. Then, in the floating toolbar, click that stylised chain link button:

As our blog grows, you will see more options in the menu below. You might want to link to a page within our blog at some point, but for now, just type or paste in a URL to an external webpage.
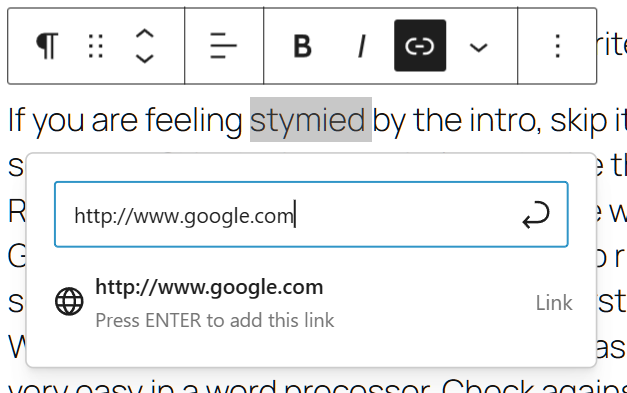
Be sure to press Enter to save the link. You may not see much change in the interface, but if you click away from that word, it should appear underlined, and will show you what the URL is attached to it if you click on it. You can preview that change in a new tab if you like.
Now let’s add an image using the block editor.
This is where the editor becomes a little more complicated, since there are so many ways to add a block. The easiest way is to click that last line where it says “Type / to choose a block” and type “/” as it suggests. You can click or press Enter to select image, since it is usually the first item available.
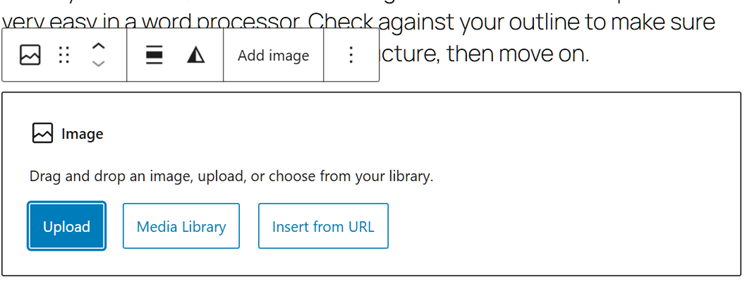
From here it is rather self-explanatory. You can drag and drop an image into that box, or browse your computer’s folders by clicking “Upload.” Media Library refers to images that are already stored on our blog website, which is probably not relevant. Insert from URL means it will grab an image from somewhere else online and repost it within your article. Let’s avoid that for now too.
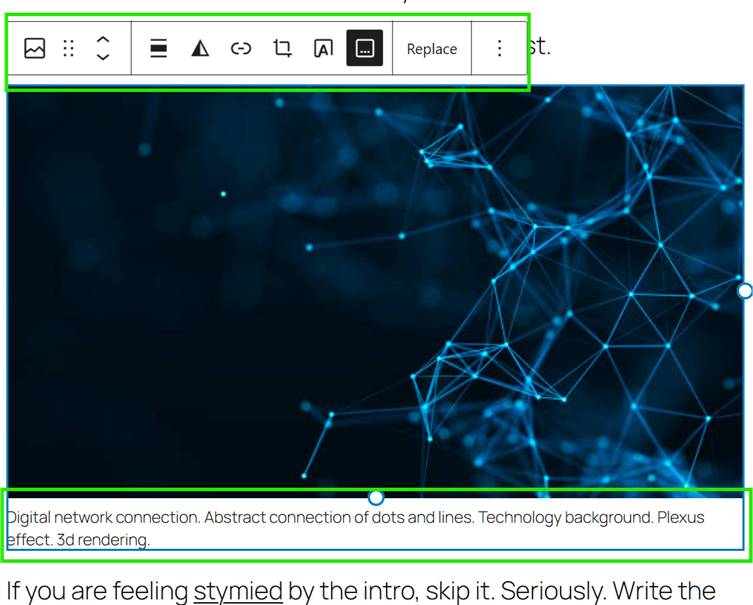
Once you choose and insert an image, WordPress takes care of the upload, creates a caption, and gives you some size adjustment handles as well. You can now also drag the whole image upwards, to place it in between other blocks (in our case here, between paragraphs) if you want that image to appear earlier in your post rather than at the end.
Also note how the contextual toolbar changes now that you have a different kind of content block in your post. Click on the image, and then mouse over the different options present in the toolbar now. The caption option is especially important—this is a good way to acknowledge credit for images that don’t belong to you, as well as to provide information for screen reading software.
There is a ton more to play with here, but don’t get too extravagant. Stick to the terms of our first assessment item, and when you are satisfied, click the “Publish” button in the top right.
Your rights as an author will require an editor (one of the teaching faculty) to approve your post. So, you will not see your actual post appear on the website right away. Soon!